





Make a wrapped candle holder
 This is craft for gifting – it’s speedy quick and yet super effective and cute. Make it in any colour you want and you’ll see just how easy and effective it is.
What you need:
* plain glasses
* cotton or bamboo yarn
* a peg (this can be used as a clamp to help you hold the string in place when wrapping)
Step 1.
Gather your supplies.
Step 2.
Begin by wrapping the thread around the glass. Tie a knot to secure. Be sure to leave the tail nice and long.
Step 3.
Wrap the glass in a random fashion, up and down, round and round until you are satisfied with the result.
Step 4.
Tie the wound end to the tail of the original knot. Snip both ends to neaten.
Step 5.
Slip tea light candles into the glasses and group together.
RECYCLED CRAFTS
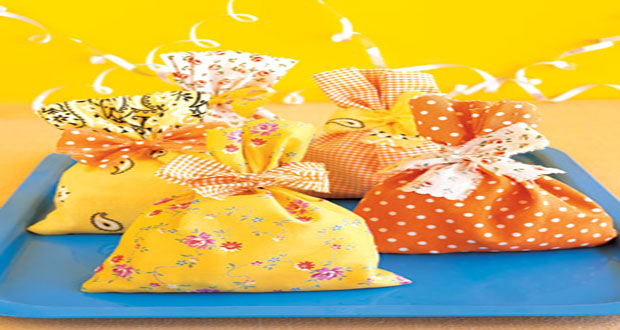
1. Fabric-Scrap Favor Packs
 Guests will say “goody” when they get these cheerful bags. Made of fabric scraps they sew up in a snap.
MATERIALS
* Fabric
* Pair of scissors
* Ruler or measuring tape
* Sewing machine
* Candy
STEPS
STEP 1
Cut an 11×7 1/2-inch piece of fabric with scissors.
STEP 2
Fold in half, right sides facing; machine-sew one short and each long side with a 1/2-inch seam allowance; turn inside out.
STEP 3
Fill bag with treats, and tie with a strip of contrasting fabric.
2. Cereal Box Organiser
 Children go through cereal fast. Make use of all the empty boxes by turning them into handy holders for their desks. Large boxes work well for books, small ones for supplies.
MATERIALS
* Utility knife
* Contact paper
* Double sided tape
* Cereal boxes
STEPS
STEP 1
Cut box with a utility knife at desired angle and height.
STEP 2
Wrap decorative or contact paper around box to see how much you’ll need; unwrap; cut. Secure paper with double-sided tape; trim excess.
Hand-Towel Beach Bag
 With ribbon, Velcro, and a few basic supplies, you can transform an ordinary towel into a stylish beach accessory or storage bag. You can use virtually any size towel and ribbon you like .For the handle attachments, there are several options, just be sure to remove the handles before washing the bag.
MATERIALS
* Velcro
* Towel
* Washable ribbon
* Binder clips
* Pins
* 2 circular handbag handles
STEPS
STEP 1
Attach the Velcro to the towel: Machine-sew a 2-by-2-inch square of female Velcro to the center of each end of the towel. (Be sure to sew the Velcro to the side that has the label, which will be the inside of the bag.)
STEP 2
Attach the Velcro to the ribbon: Cut the ribbon to the appropriate length (for a hand-towel-size bag, cut 1 yard). Sew a 2×2-inch square of male Velcro to each end of ribbon. Fold over the ends of the ribbon, and fold over again, creating two folds. Hold the ribbon in place using a binder clip, and tuck the Velcro under the fold. (Folding the ribbon over protects it from fraying and creates a neater line.) Once the Velcro is secured in place, sew each side of the Velcro onto the ribbon.
STEP 3
Attach the ribbon to the towel: Pin the ribbon down the center of the towel, making sure the Velcro is on the underside. (There should be an even amount of ribbon hanging off each end of the towel, about 4 inches, which will be wrapped around the handles, attaching them to the bag.) Machine sew the ribbon onto the towel.
STEP 4
Fold the towel in half so the two top ends meet and the ribbon is on the inside (the bag will be inside out at this point). Sew up the two sides, leaving a 1/2-inch allowance, and turn the bag right side out. Wrap the ribbon hanging off each side around each handle attachment, and attach the Velcro to the bag.
3. Decorative Jar Lids
 If you’re going to do creative work, your craft supplies should look the part. Here’s a way to decorate basic jam jars with lively fabric scraps.
MATERIALS
* Fabric scraps
* Jam jar with lid
* Scissors
* Spray adhesive
STEPS
STEP 1
First, cut out a circle big enough to cover the lid — including the lip, inside and out. Put the fabric face down, and apply spray adhesive. Center the lid on the fabric.
STEP 2
Fold up a section of the fabric so it adheres to the outside of lid lip. Snip a slit every inch or so on the remaining fabric (make sure not to cut past the edge of the lid). Press flaps over so they stick to the interior of the lip.
STEP 3
Fill jar with sewing notions (or other miscellany), screw on the lid, and get inspired for your next project.
Written by Rebecca Ganesh-Ally